
Get Started.

To those without much (or any) coding experience, it can be quite daunting wondering where to start with R. This short guide aims to get you set up quickly and easy, whilst hopefully avoiding a bunch of confusion along the way!
Installing R
Put simply, R is a programming language. Like any language, we must first learn how to understand it before we can use it. Our first task is to install R on our computer, which will allow our computer to use and understand this particular language.
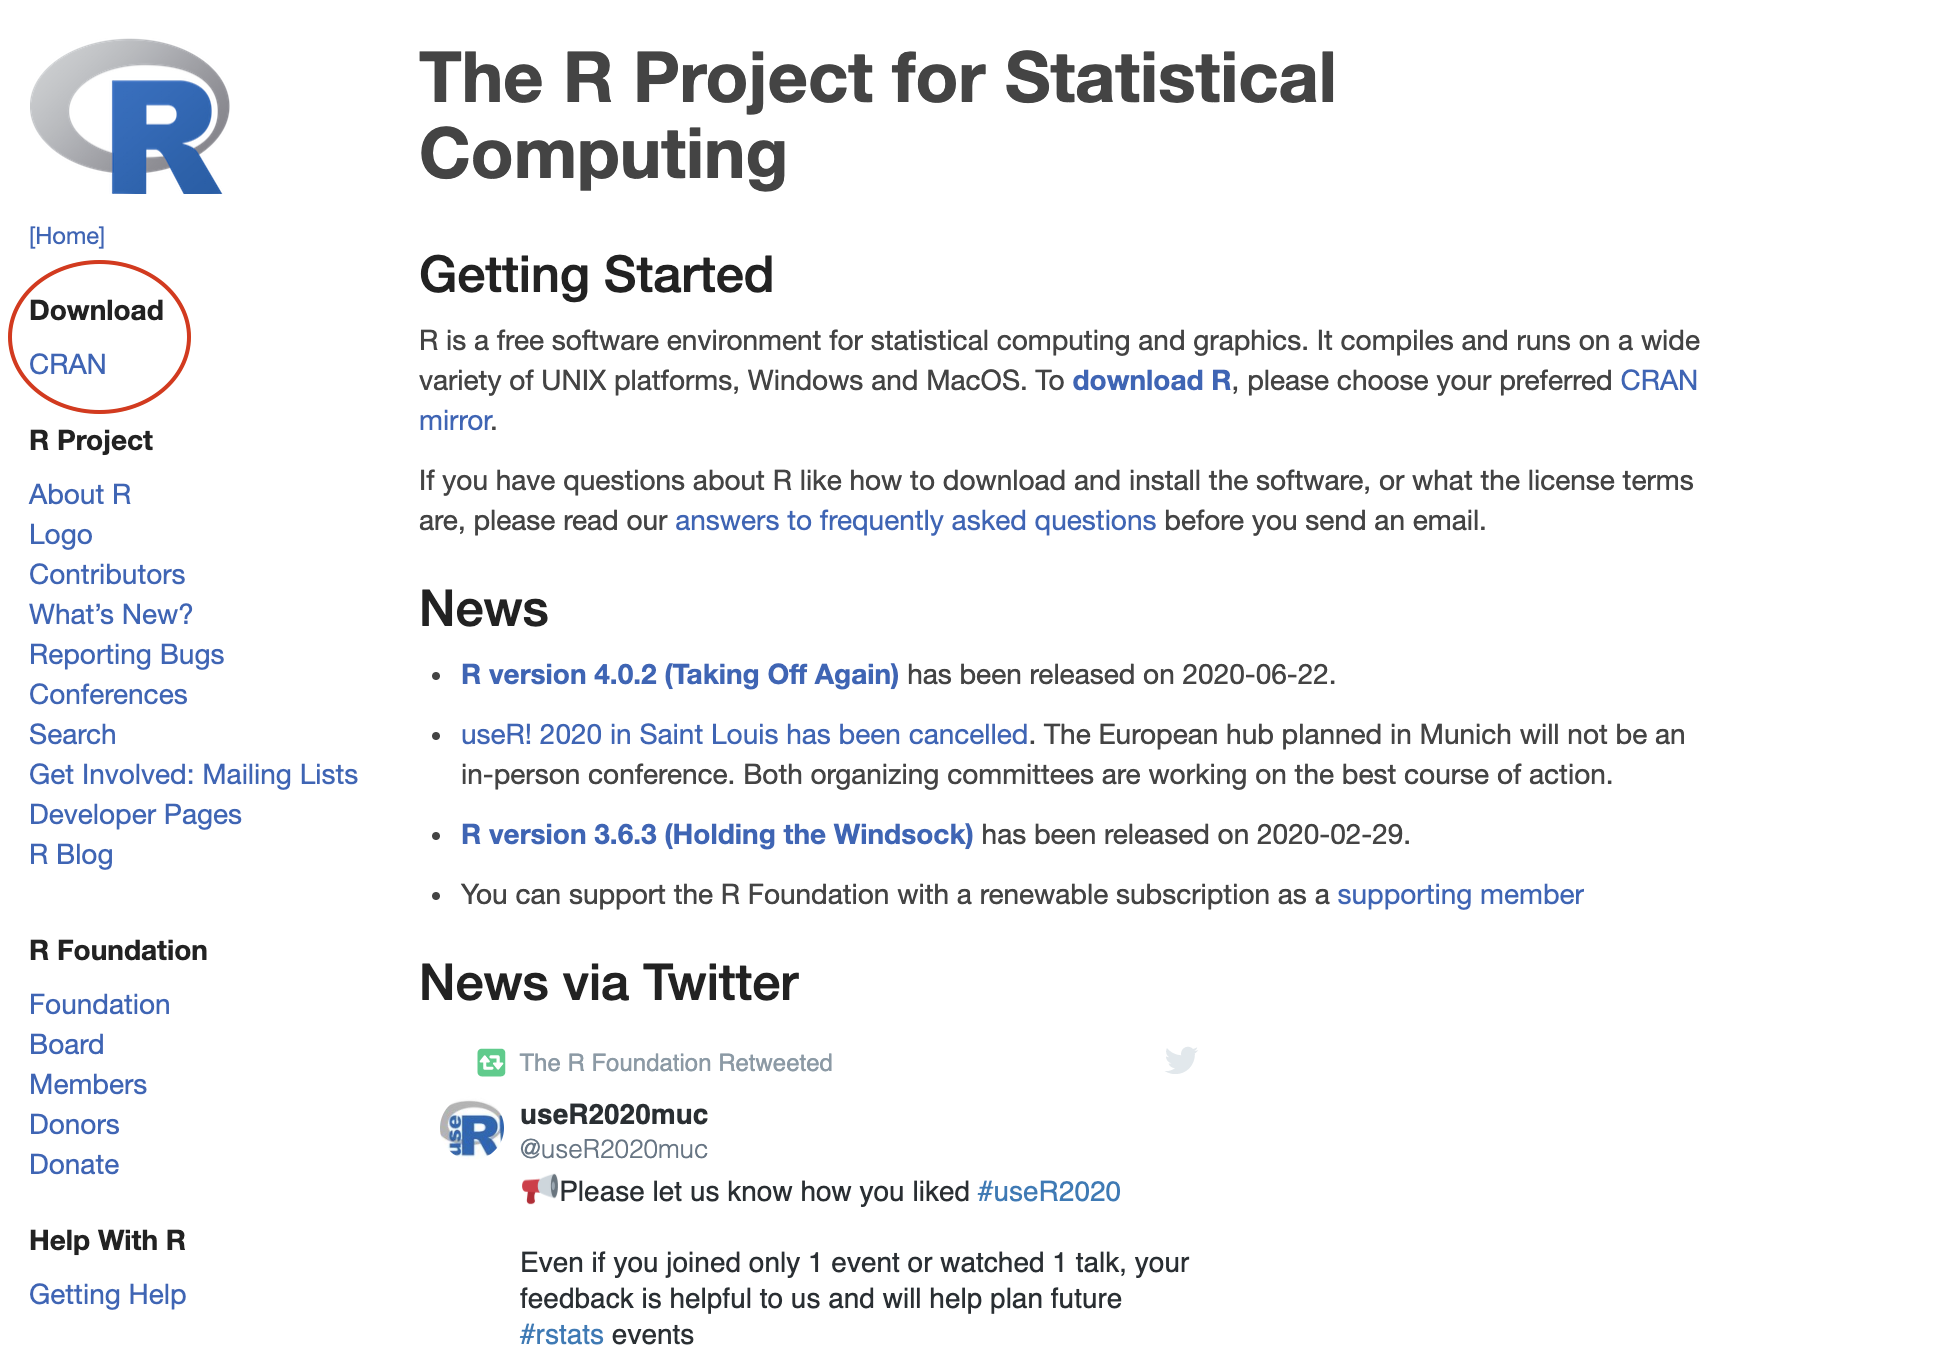
Go to R-Project.org, or simply Google "R" to navigate to the same site. On the left side of the index page, click the "CRAN" link found beneath the "Download" section:
On the following page, scroll down to your index country and click on any of the available links:

This will take you to the download page, where you can choose the file appropriate for your operating system:

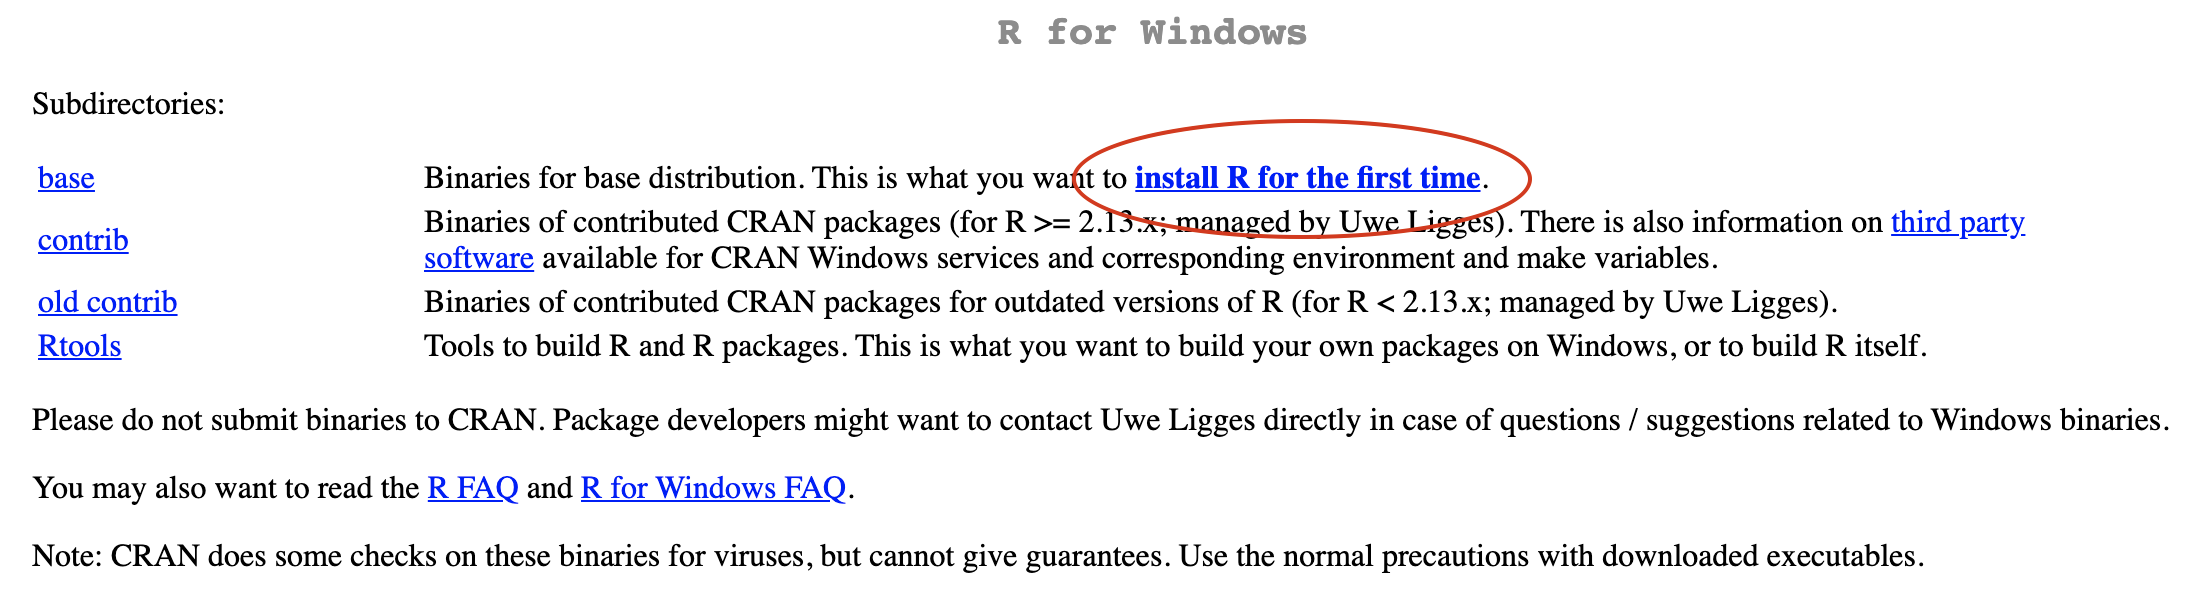
If you're a Windows user, after clicking "Download R for Windows", you'll then want to click on "base", or "install R for the first time" (both links will take you to the same download page):
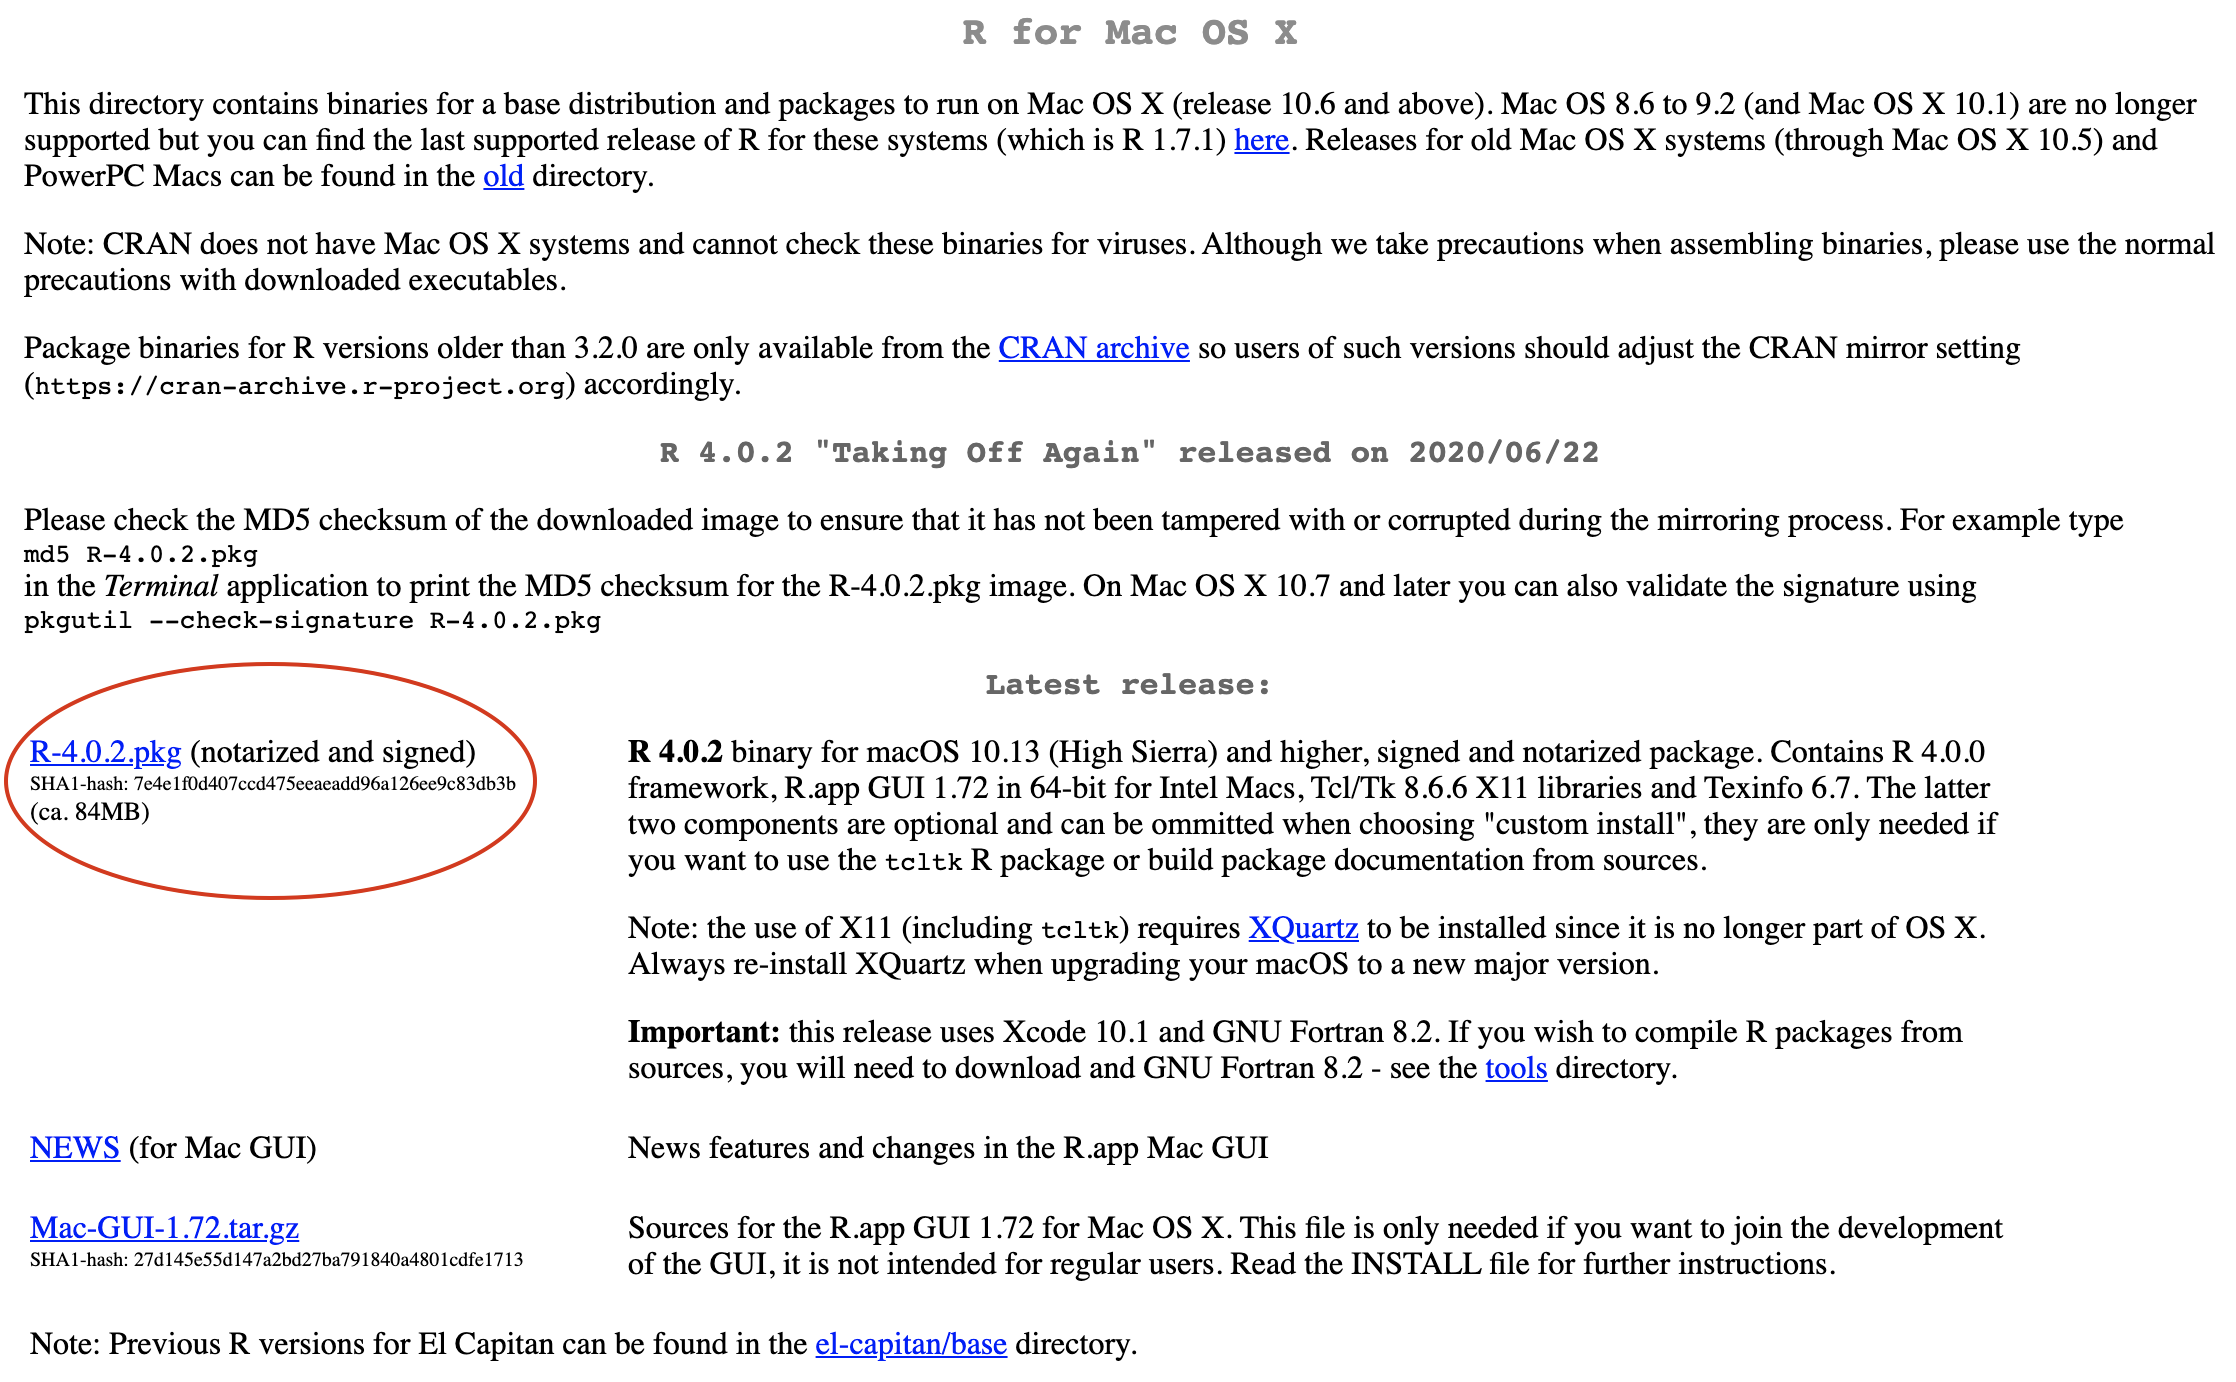
If you're a Mac user, after clicking "Download R for (Mac) OS X", you'll have a number of options based on whichever Mac OS you're currently running (you can check this on your Mac by clicking the top left Apple logo > About this Mac). If you're running the latest version of Mac OS, you'll want to download the "latest release" of R:
Once downloaded, open the installation file and follow the on-screen instructions to install R on your computer. We're half way there - now we just need an interface where we can write and run R code. This is where 'RStudio' comes in.
Installing RStudio
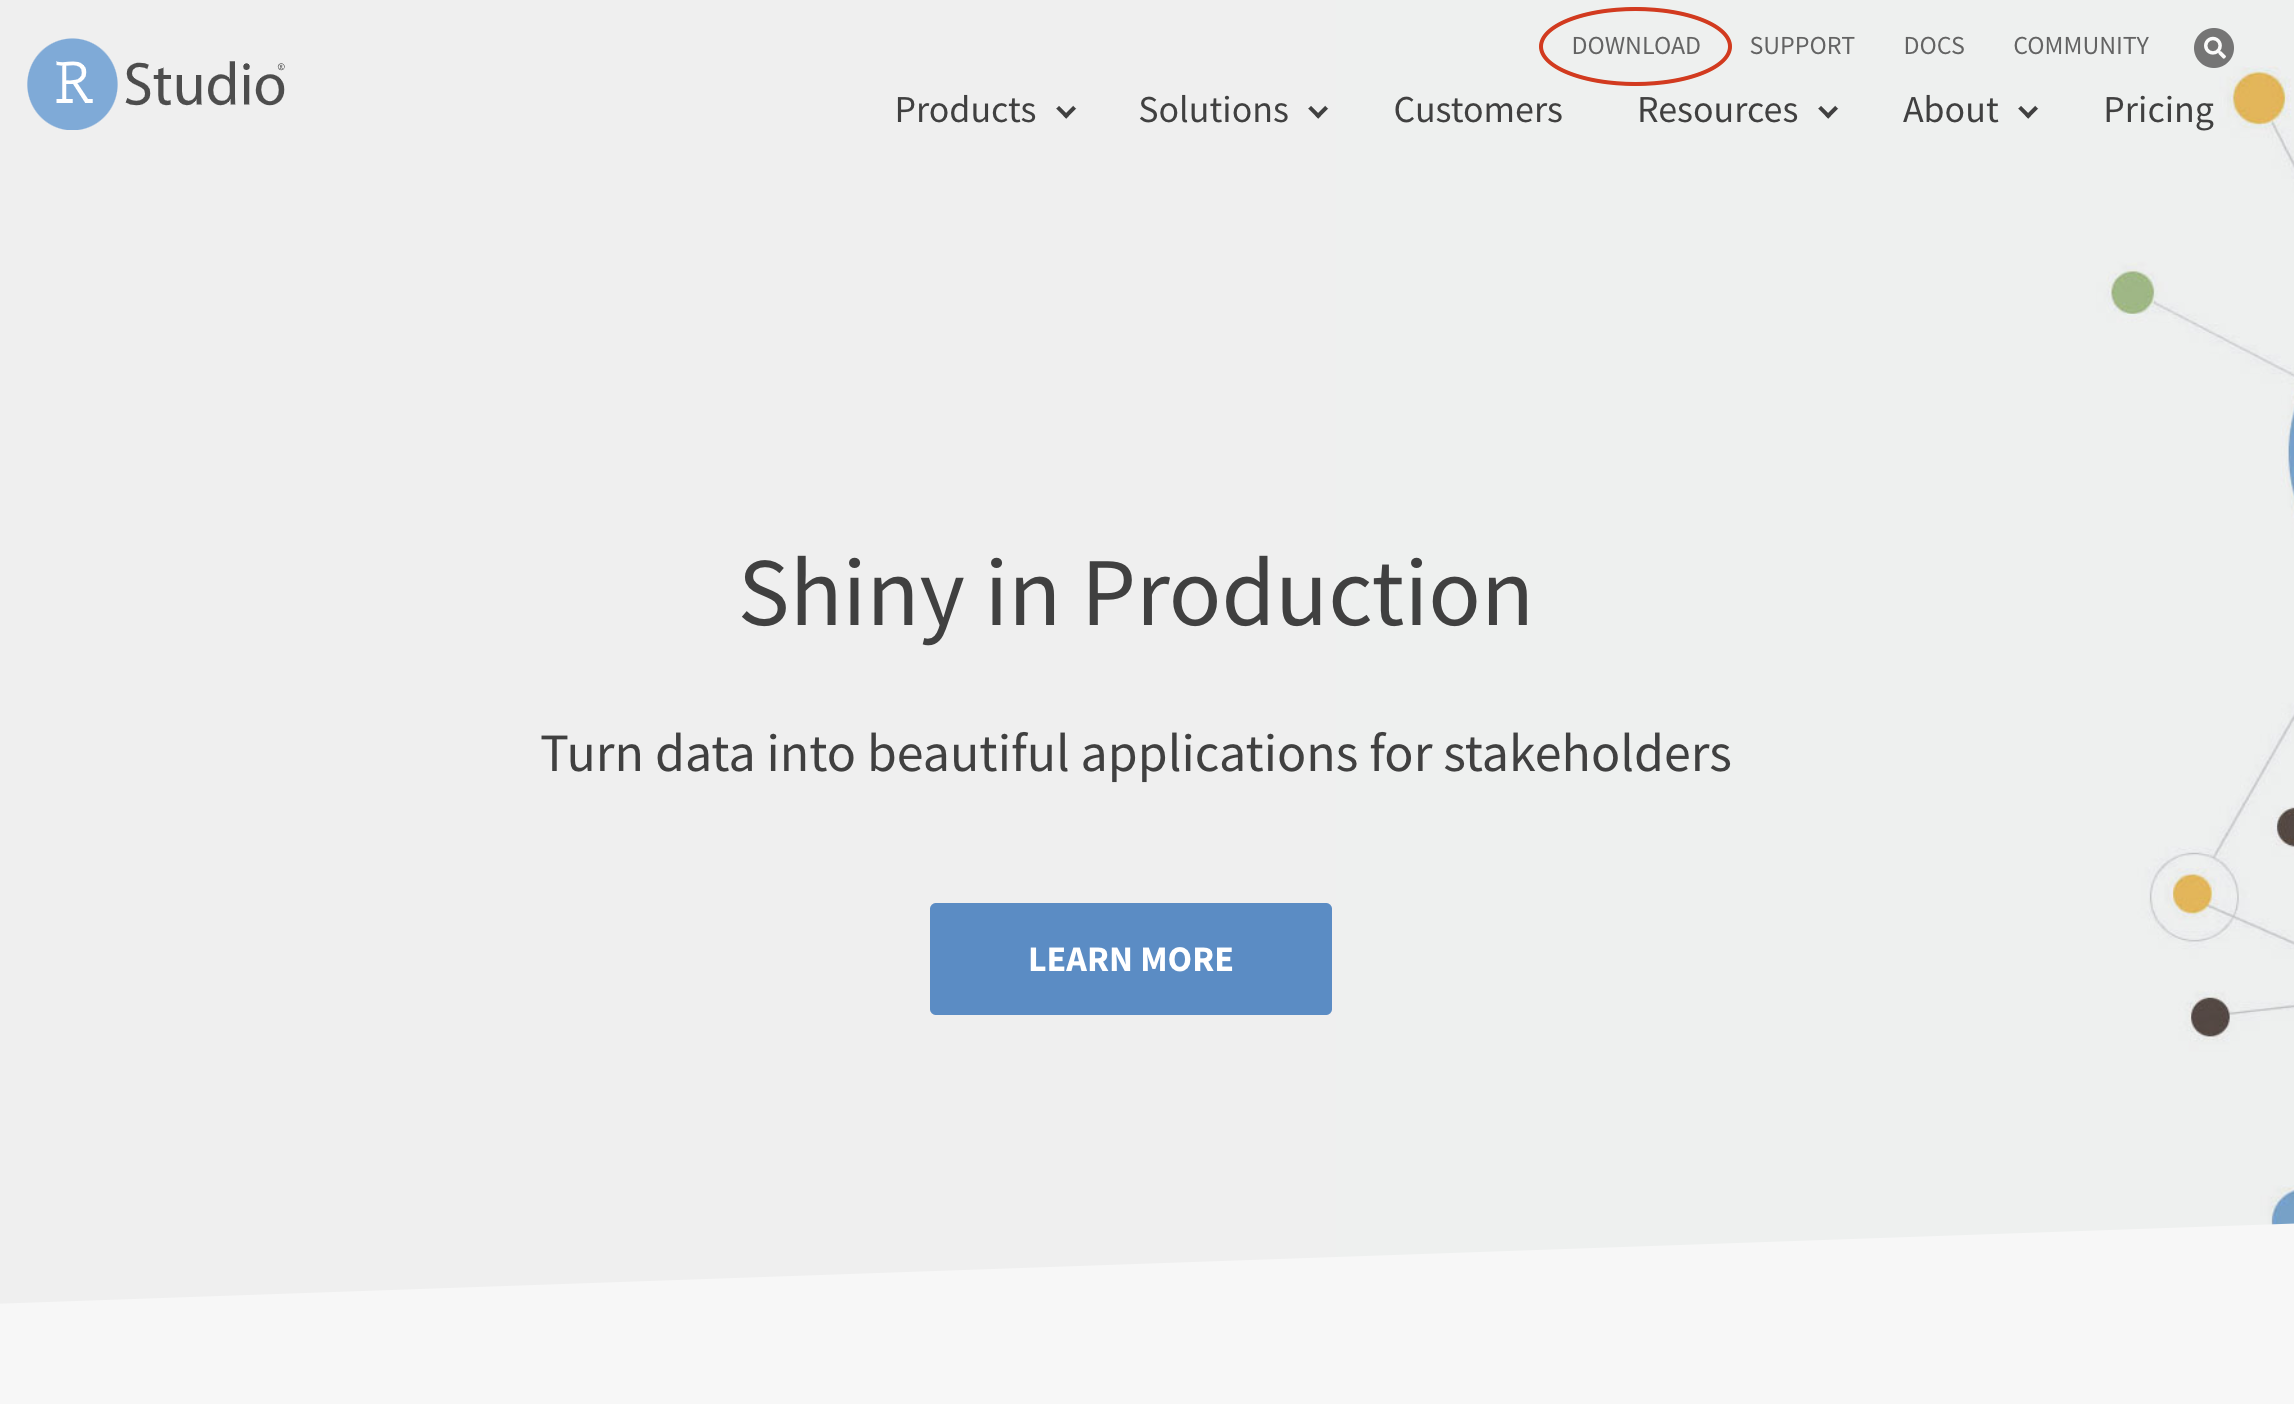
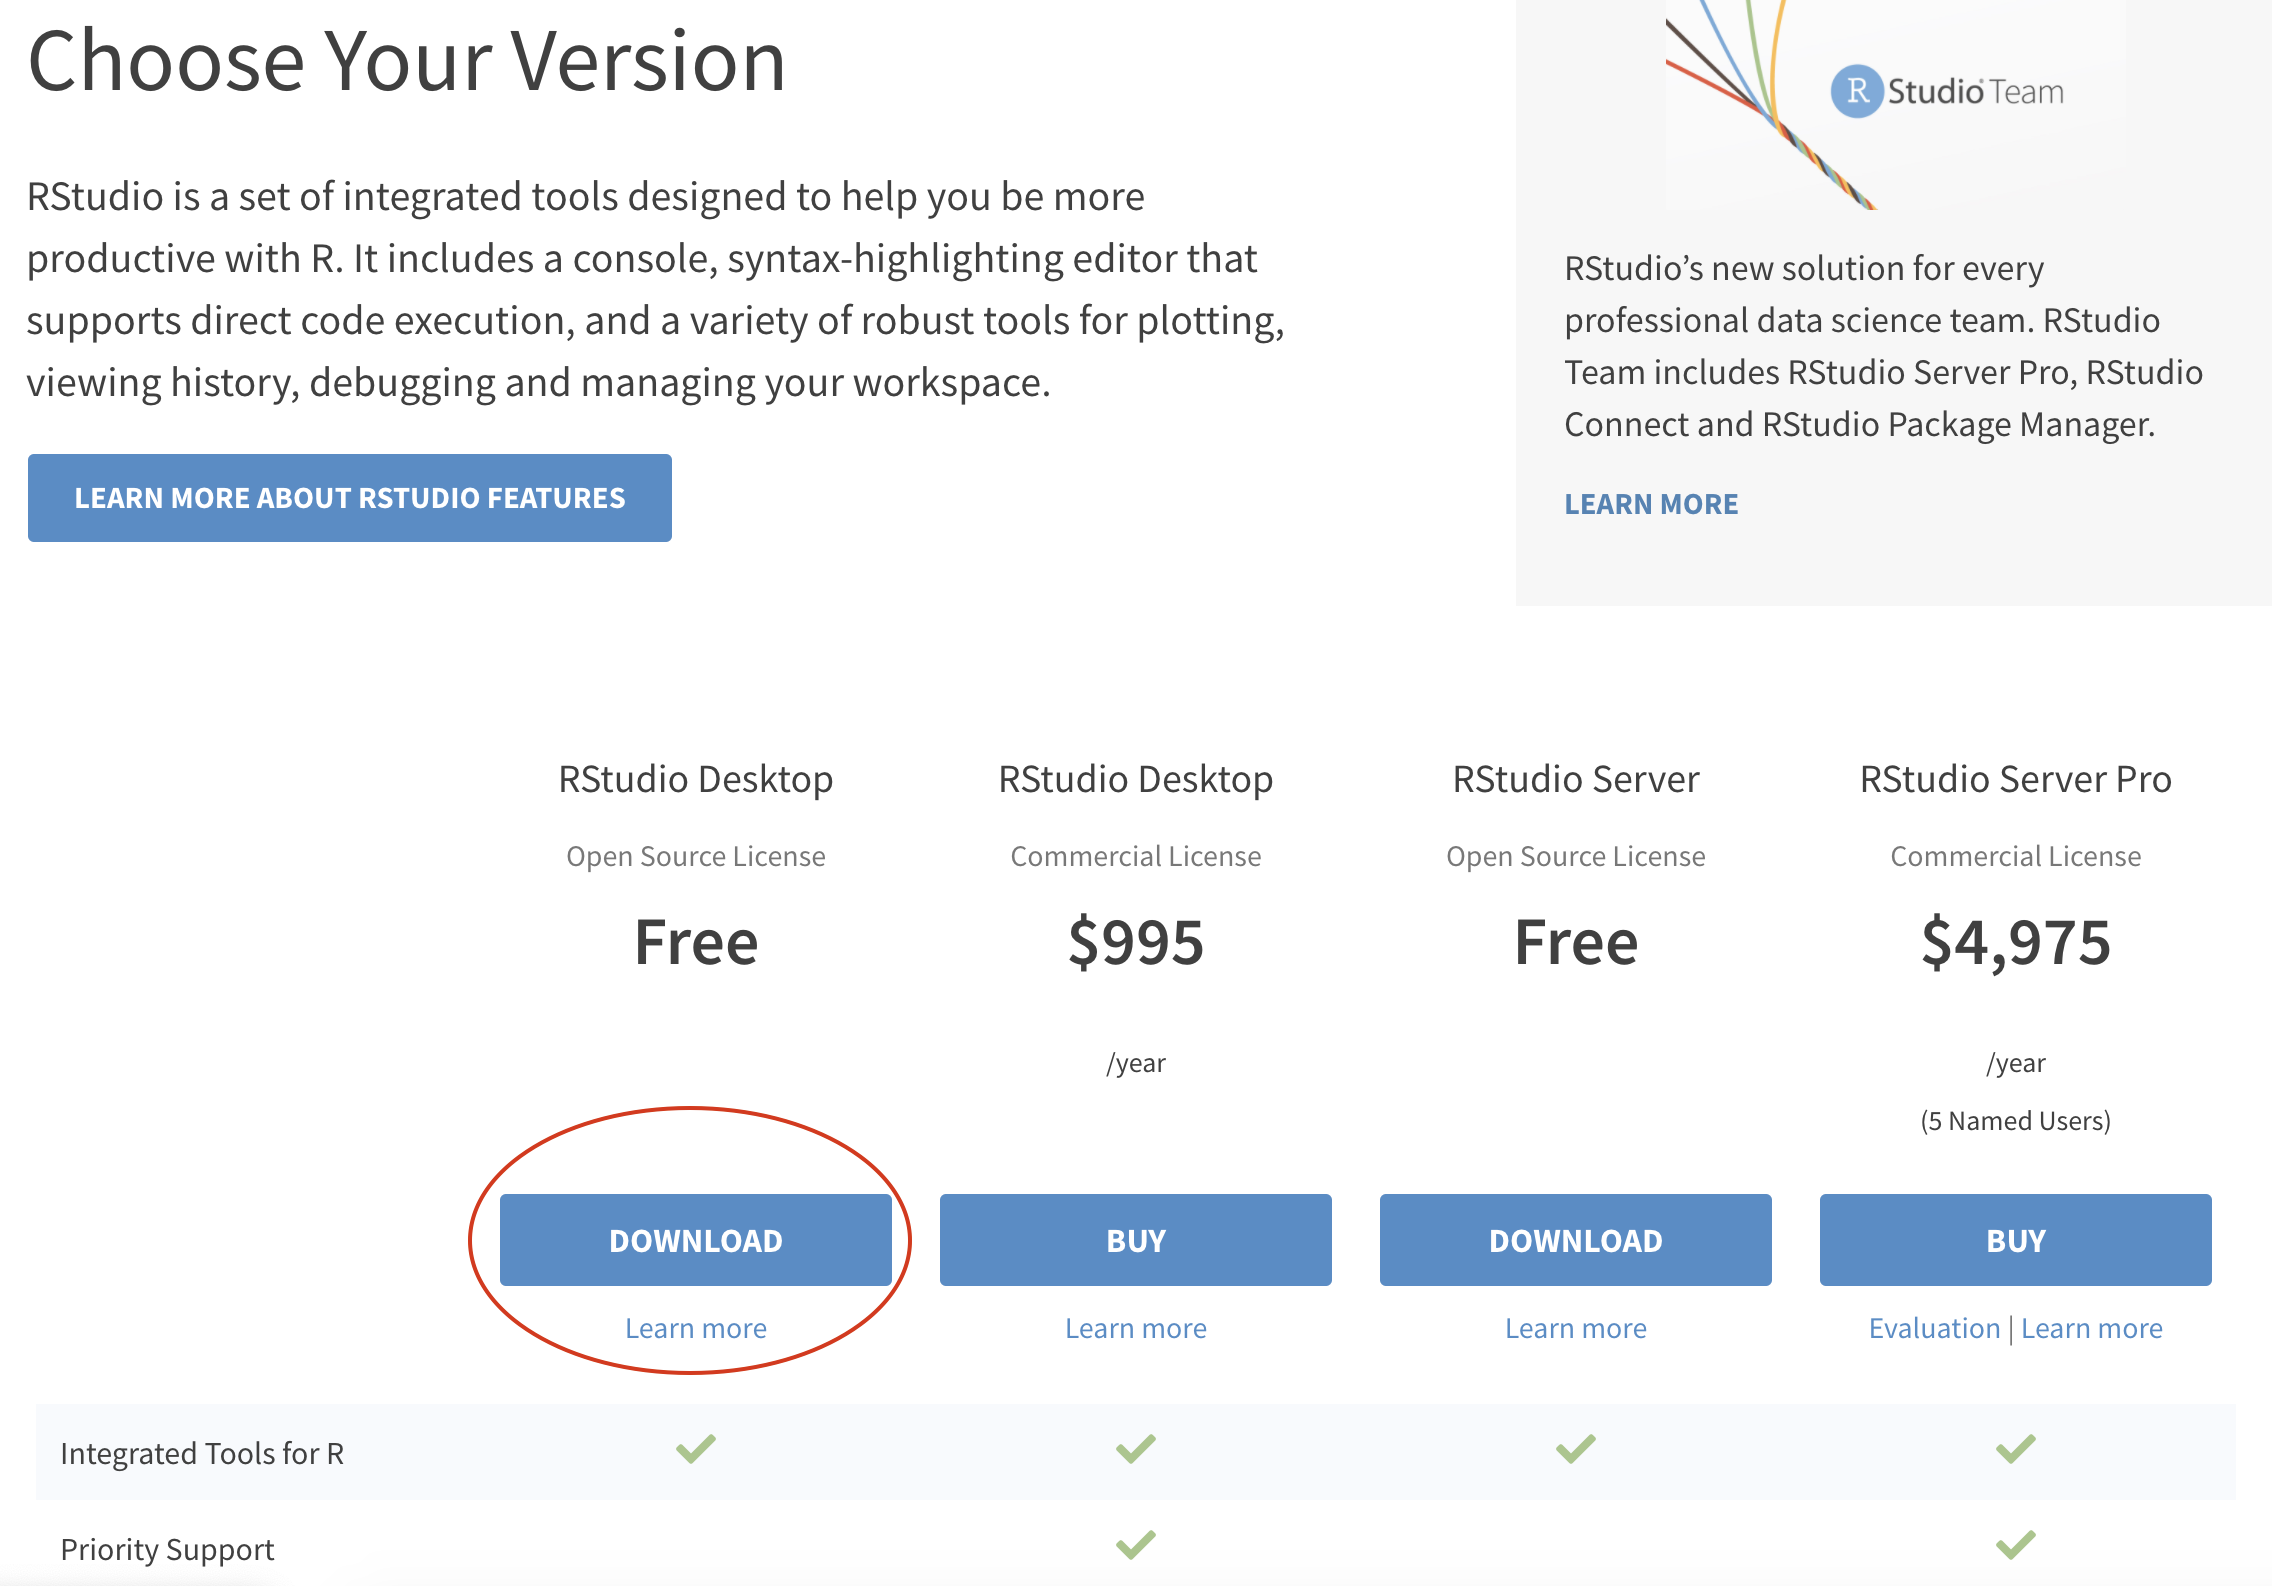
Go to RStudio.com, or simply Google "RStudio" to navigate to the same site. At the very top of the index page, click "Download":
For our needs, the Free version is great:
Once downloaded, open the installation file and follow the on-screen instructions to install RStudio on your computer. When RStudio launches, it'll probably look something like the image below. You want to see those 4 windows, so if you don't see them all, try playing with this button until you do:
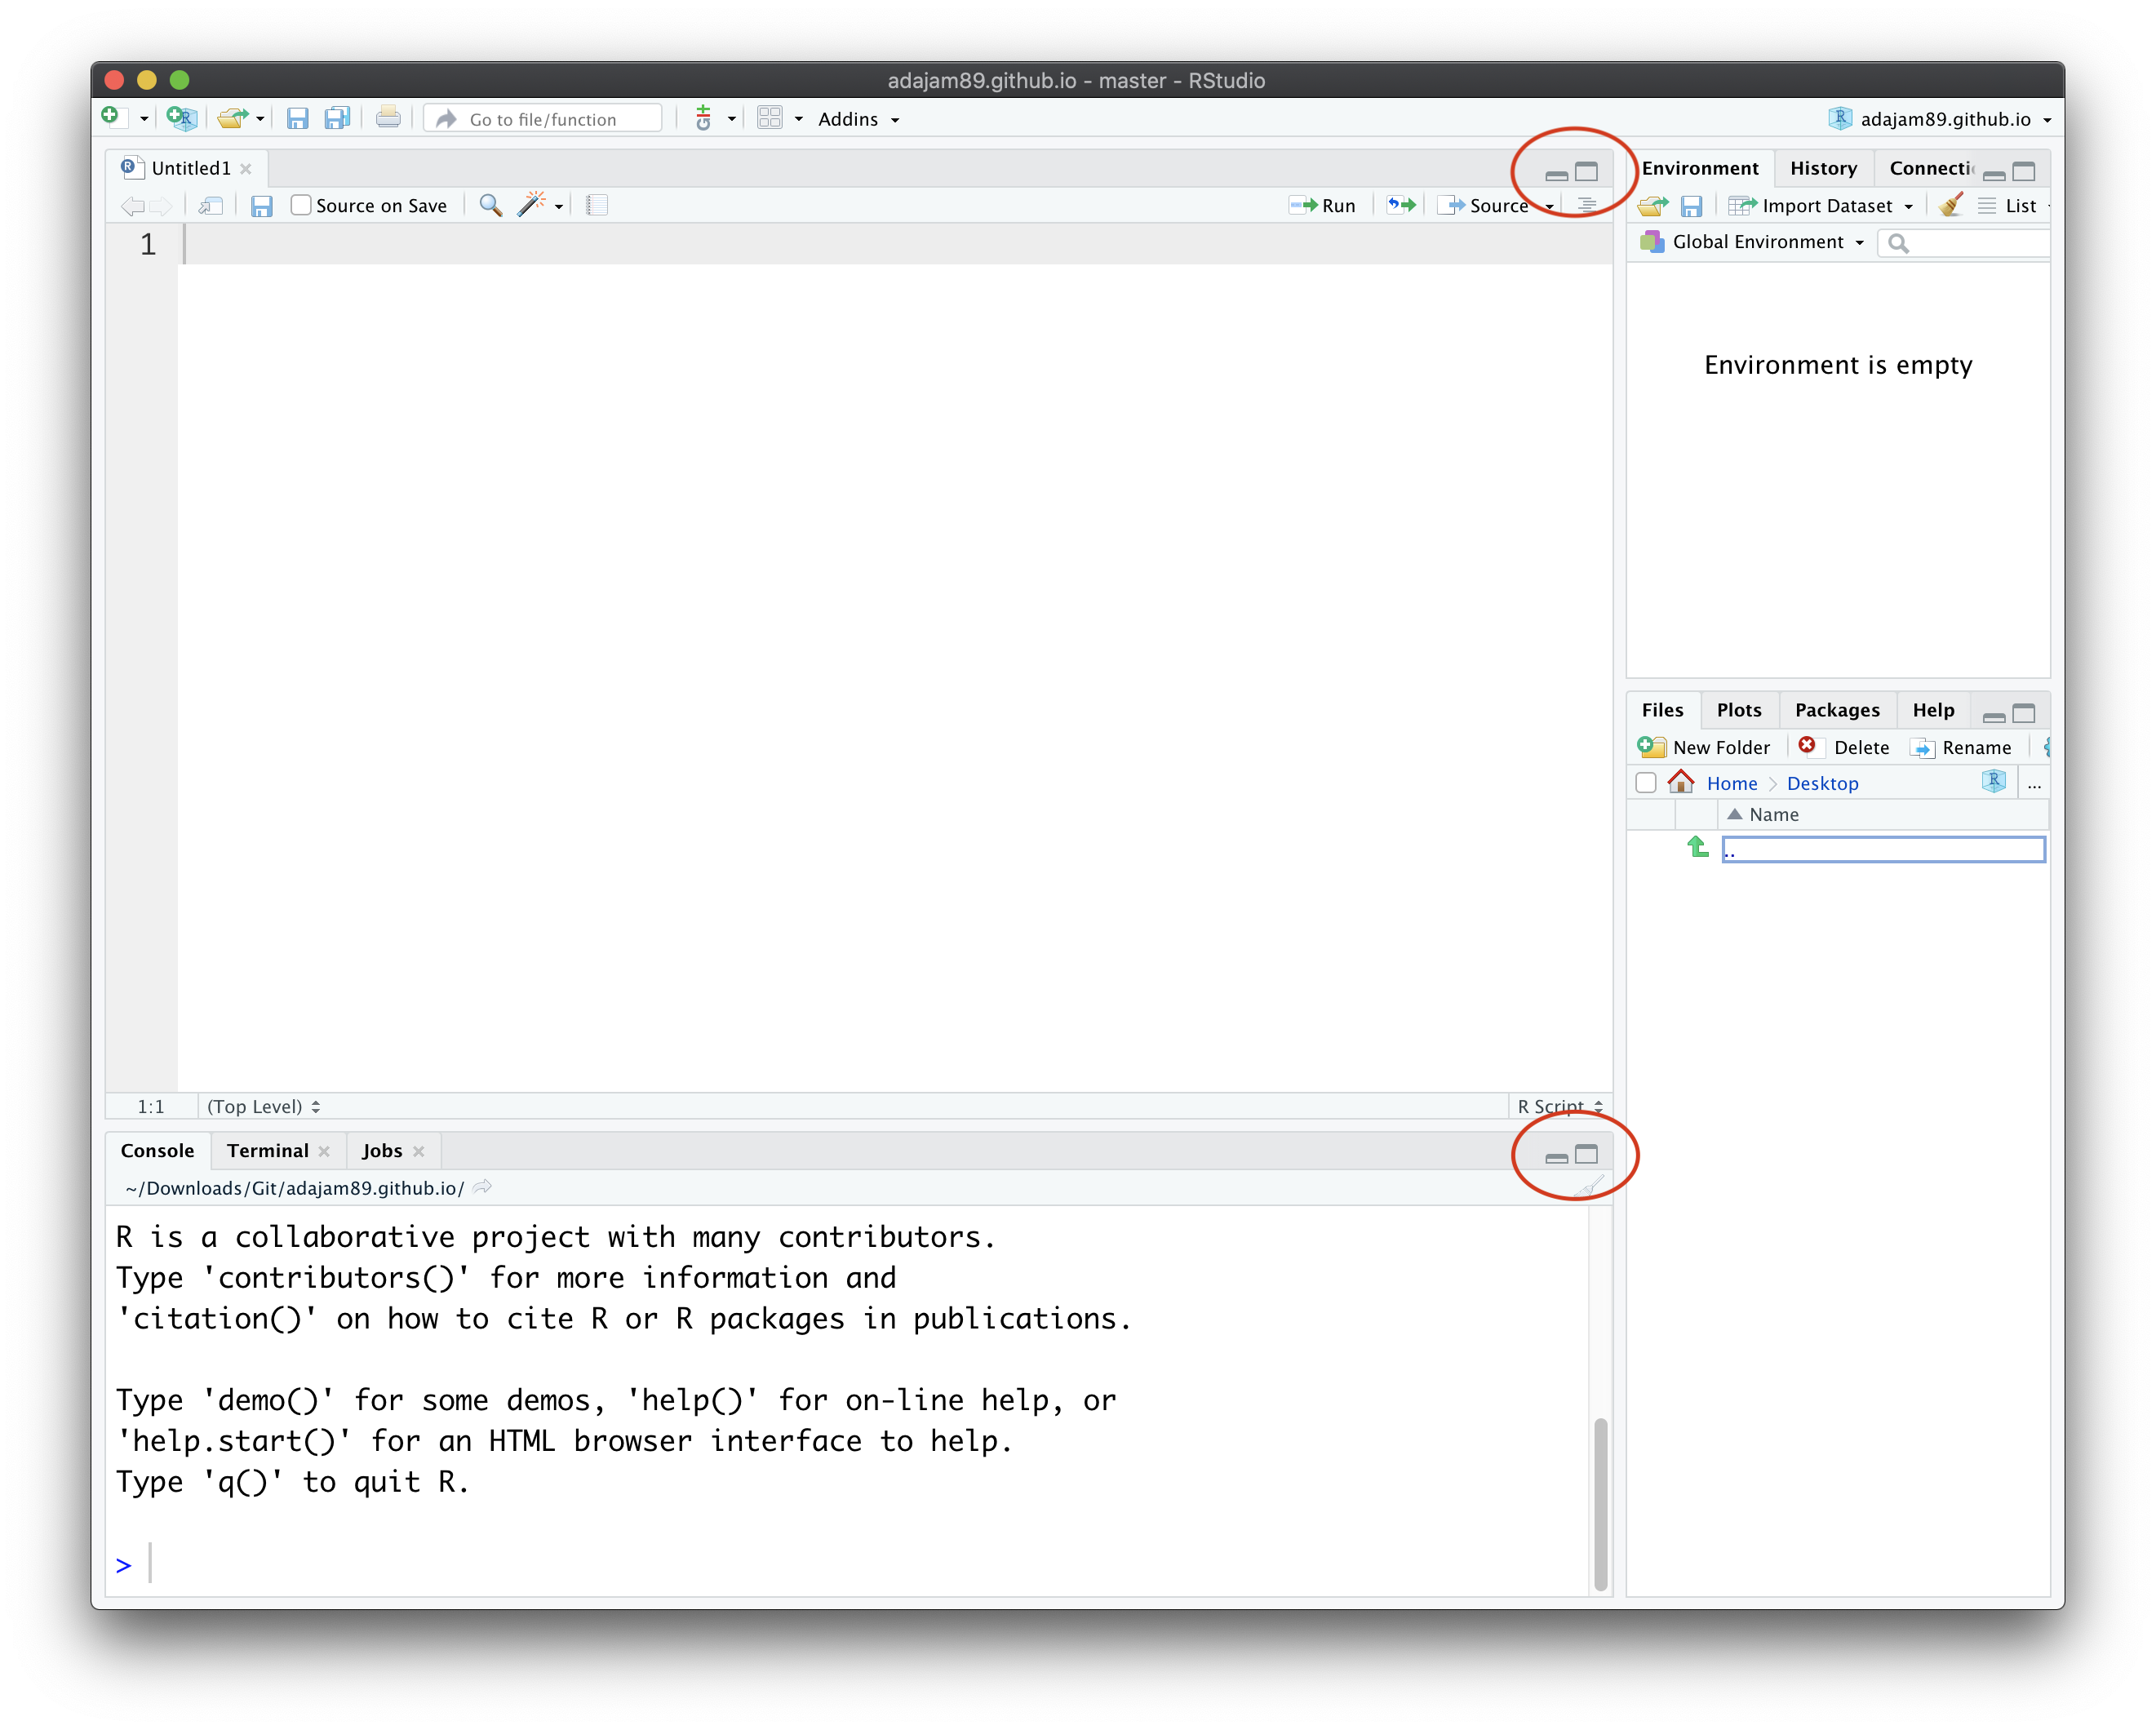
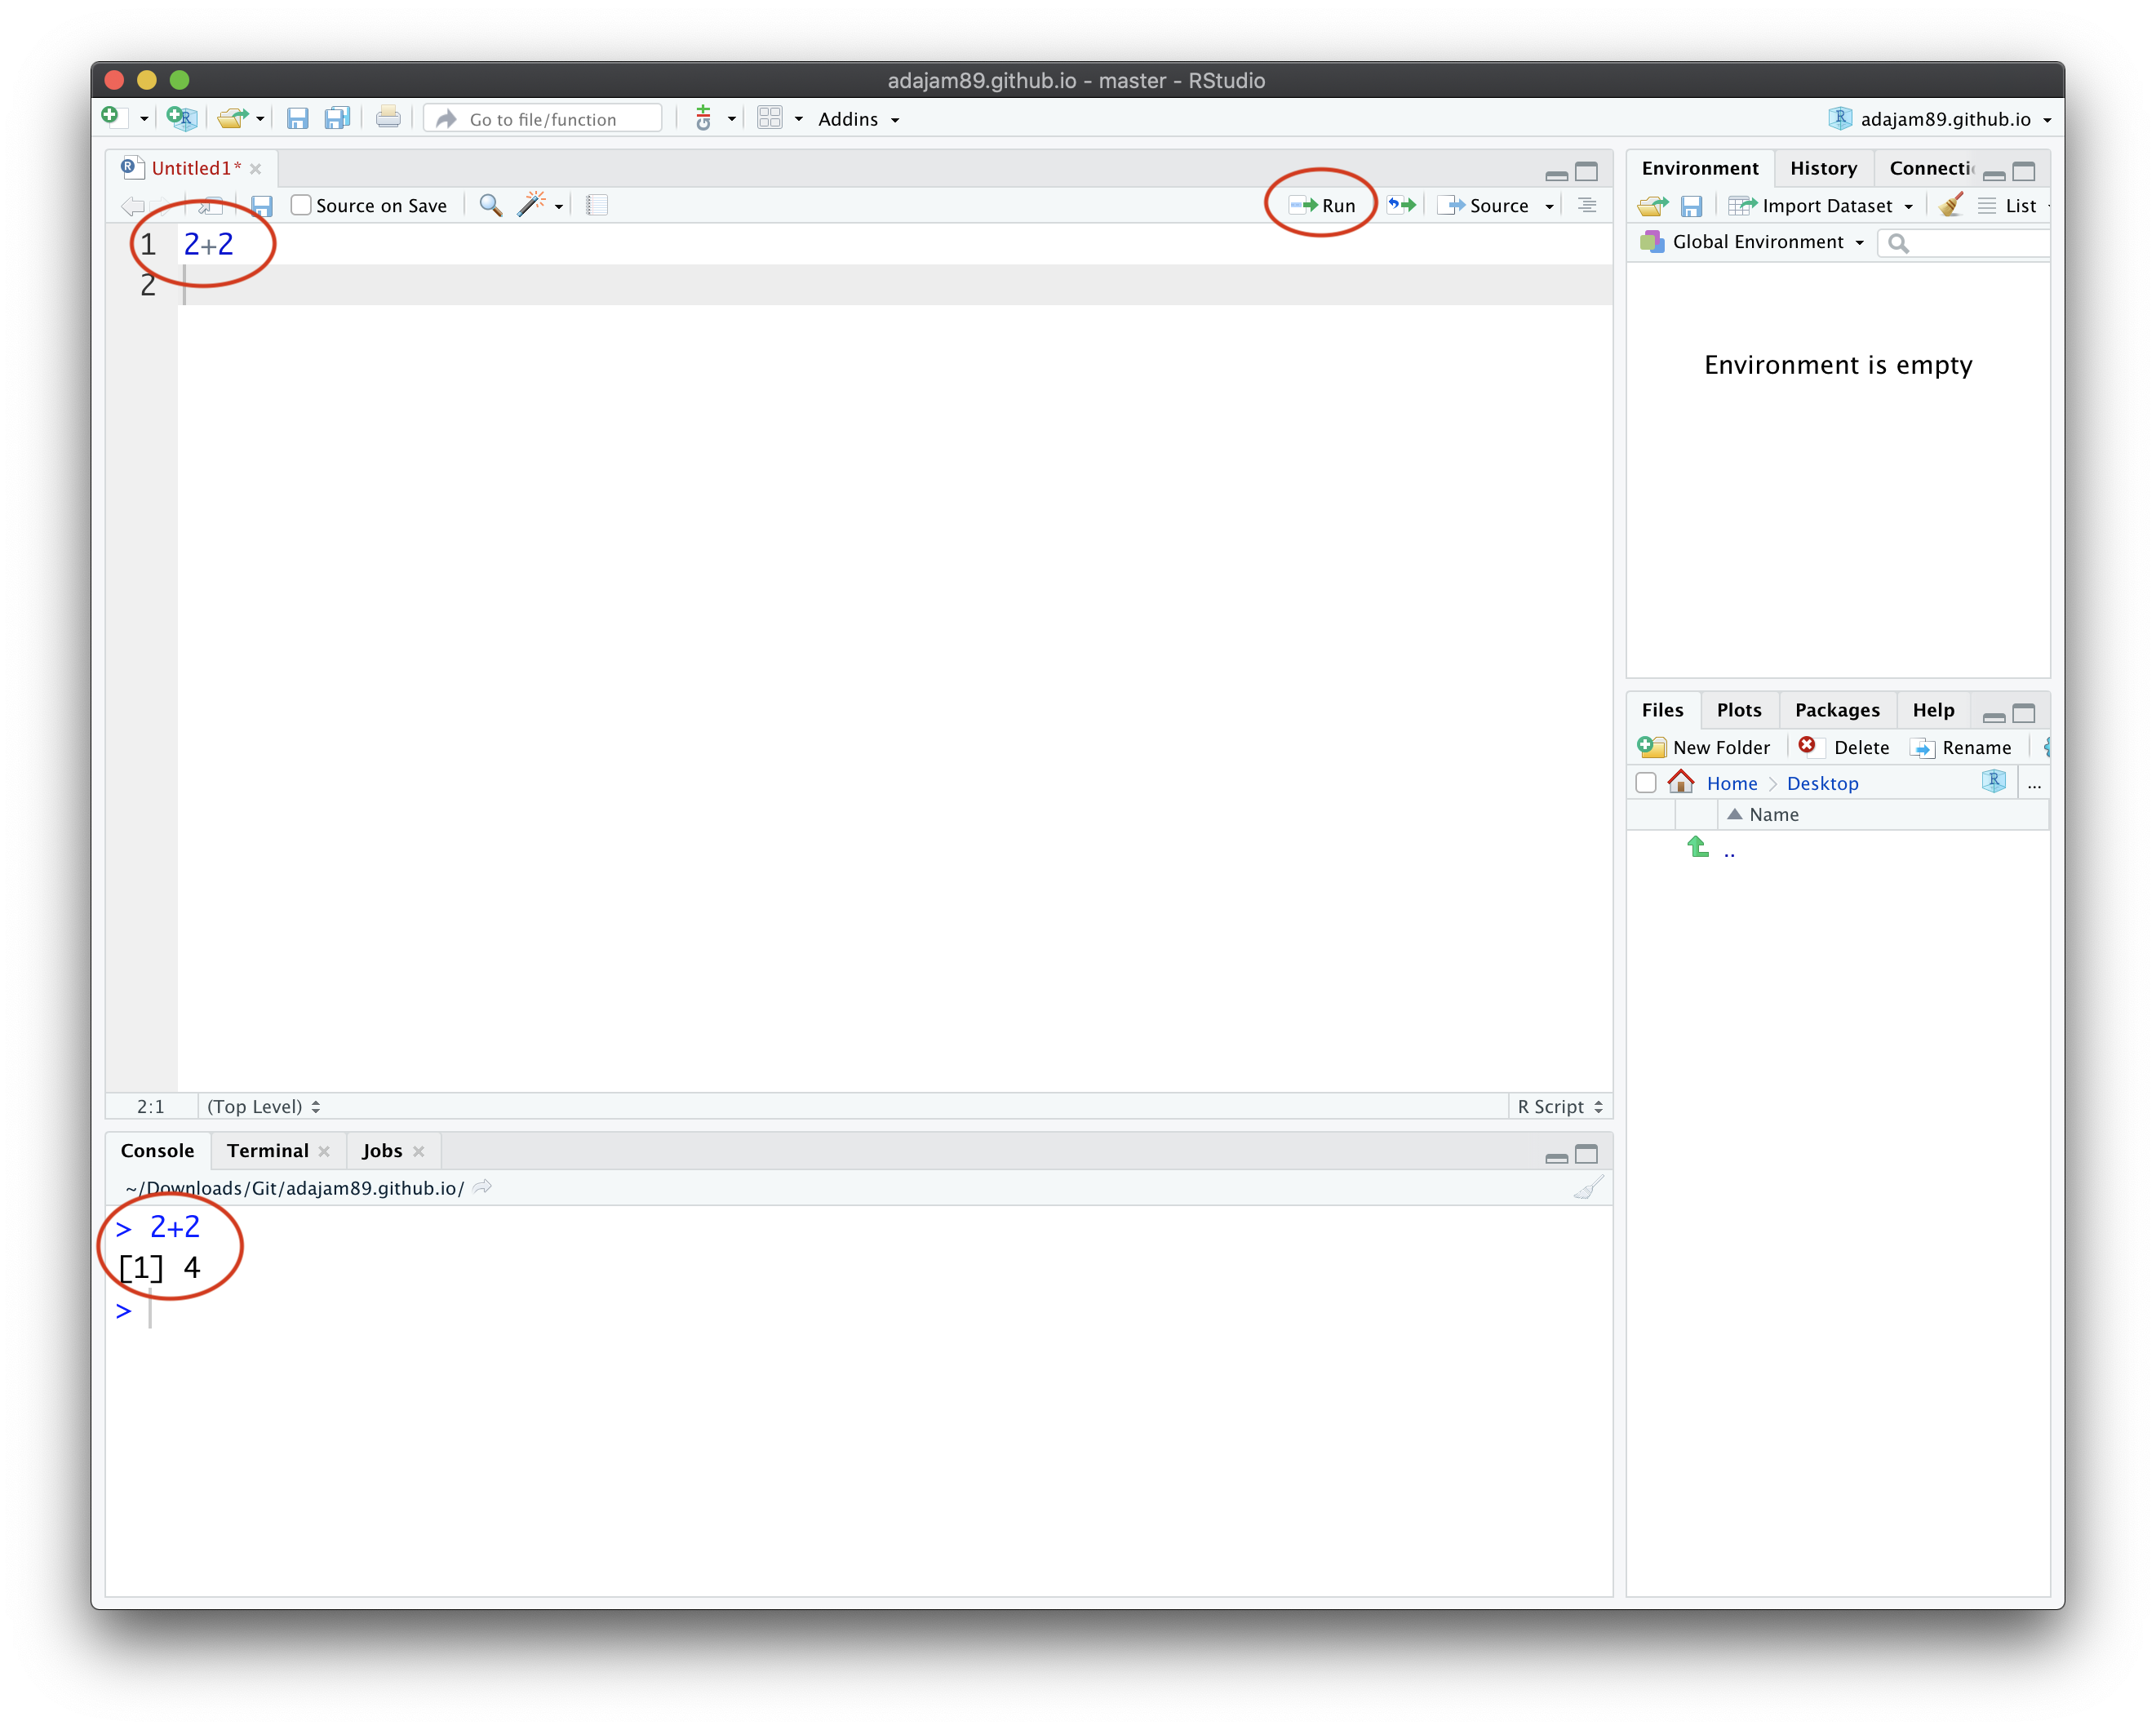
The bigger pane on the left is called the "Source" window - this is where you'll write your code. The bottom one is the "Console", where your code is evaluated and carried out. A really quick exercise to demonstrate what these windows do in practice, is to try writing a simple math sum in your Source window. When you press the "Run" button, your code is evaluated and the result displayed in the Console window:
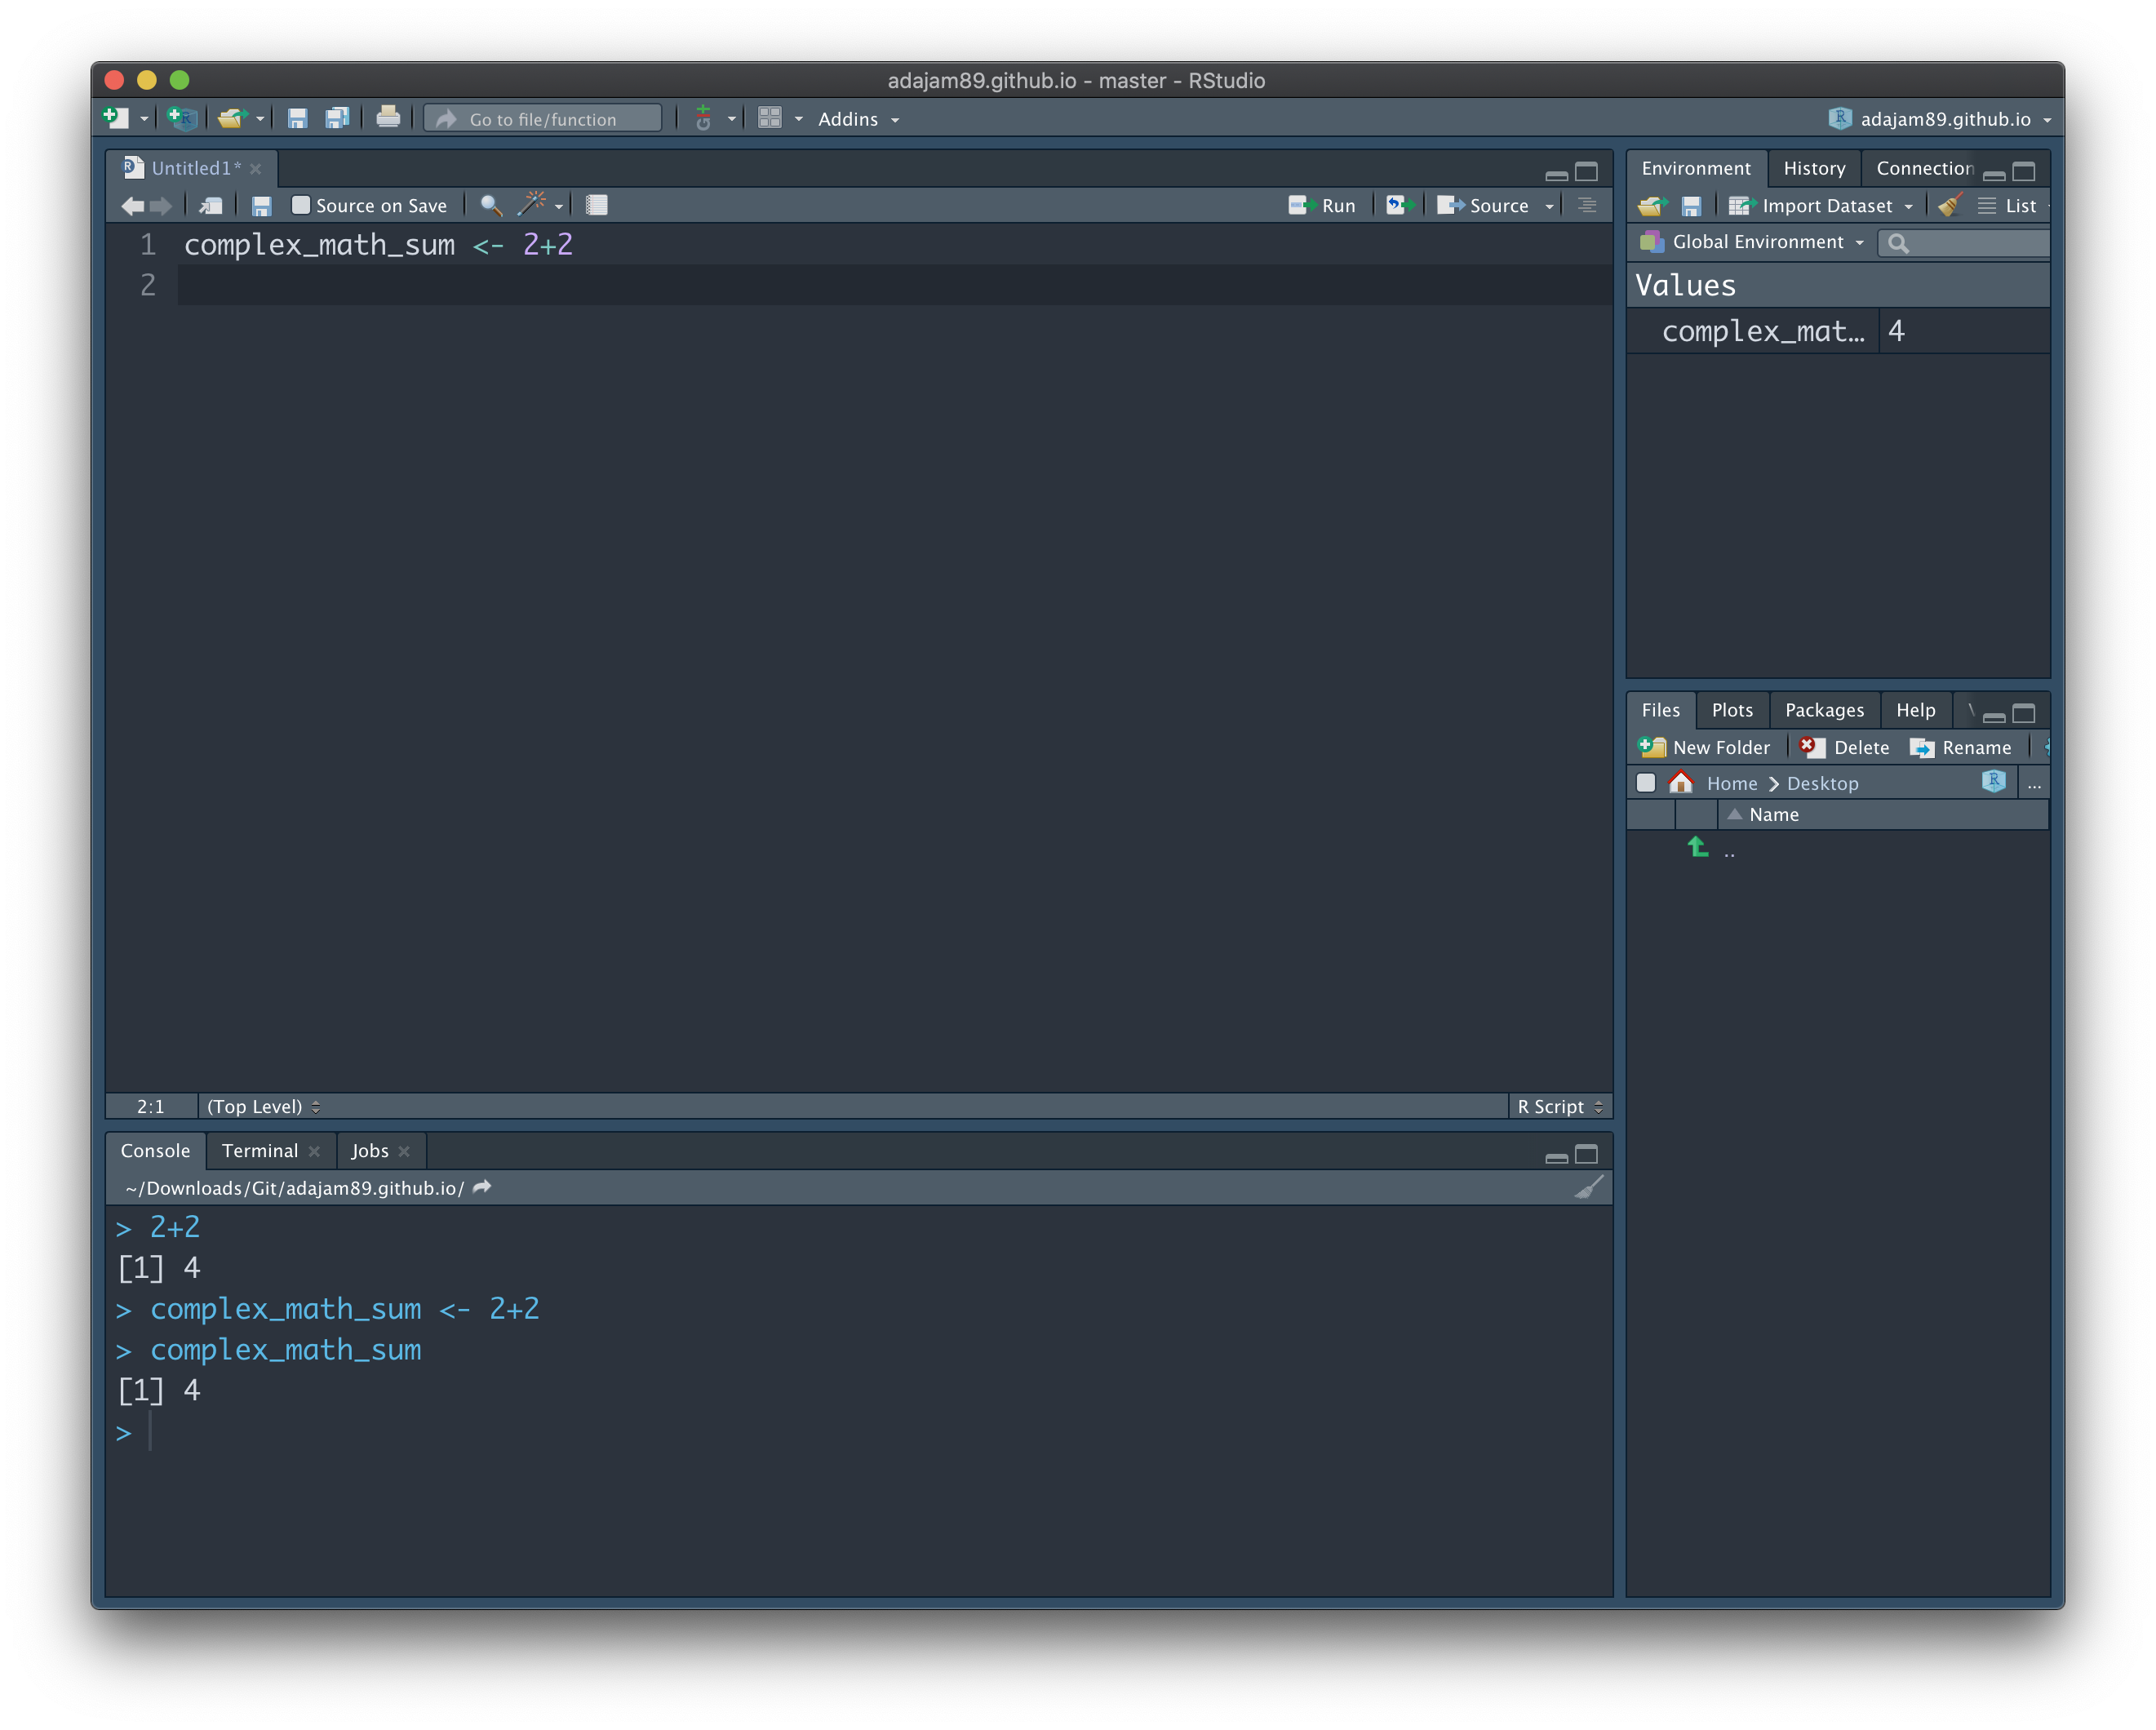
The top right pane is the 'Environment' window. When you create any variables (e.g. your imported data), they are stored here. We can do another super quick exercise to demonstrate this; lets make our math sum a variable that we can call upon whenever we like. In the Source window, type in "complex_math_sum <-" in front of the sum. The "<-" essentially means "assign the code on the right, to the variable name I've put on the left". You should see your new variable appear in the 'Environment' window:

You can almost think of variables as shortcuts, saving us from typing out all of the information whenever we want R to do something with it. To check that our math sum has indeed now been saved to the variable named "complex_math_sum", try typing "complex_math_sum" into the Console window at the bottom. RStudio will now know that this means "2+2", and will evaluate this code to give us the same answer as before:

In practice of course, our variables will probably be much more complex than that. You might import all of your raw data into the variable "raw_data", and when you enter this into the Console window, all of your data will be output. But don't worry about that too much right now. Instead, lets make RStudio look nice. You might end up spending countless hours looking at this very screen, so it's important to get comfortable. Navigate to RStudio's main settings / option panel (on a Mac: RStudio > Preferences), and click on the "Appearence" tab on the left:
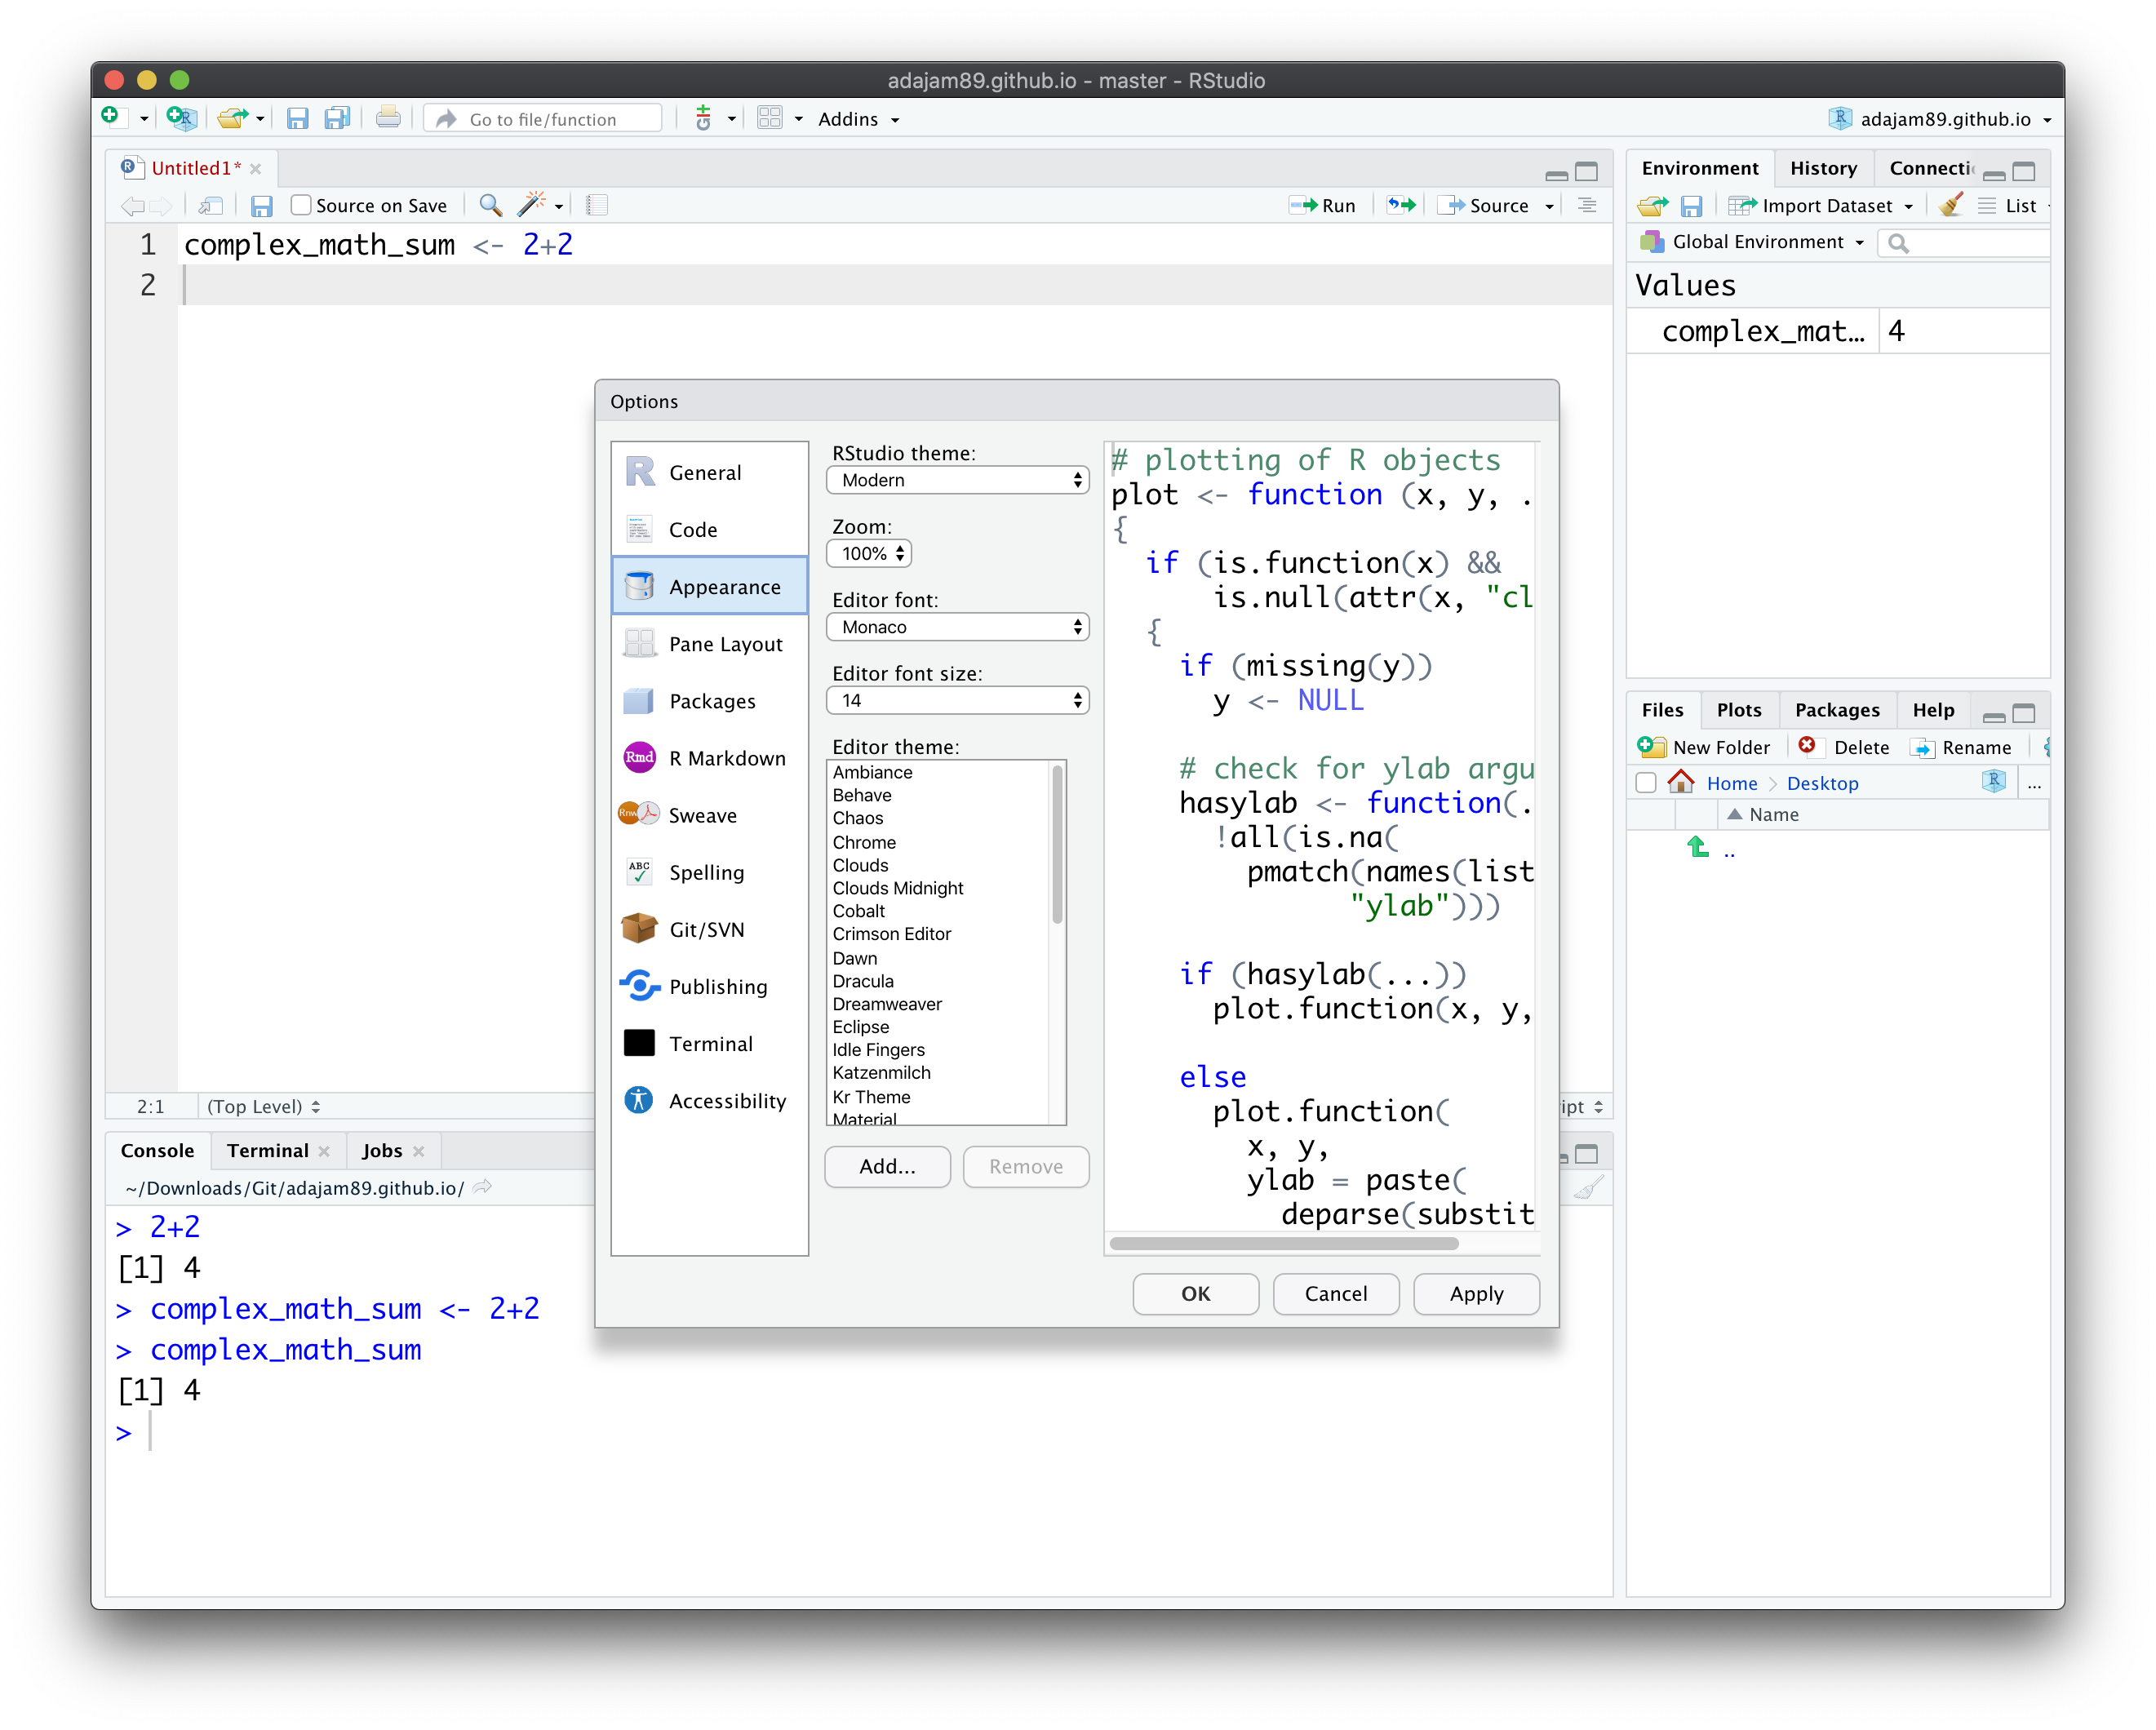
Set the Editor Font Size to something comfortable, then take a look at the different Editor themes. My only advice here would be to choose a 'dark' theme - something that'll be easy on the eyes for extended periods - otherwise, go wild. My personal favourites are 'Behave' and 'Material'. Once you find one you like, hit Apply > OK, to give your window a makeover:
You're now up and running and ready-to-go!
Check out the next guide here: Importing data: the basics.